
How To Connect A Brother Printer? [Step-By-Step Guide]
If you're looking for how to connect a Brother printer, you have come to the right site. This post guides you on how to connect your Brother wireless printer on Windows/Mac and how to connect your Brother printer via Wi-Fi Direct.
In our daily life, we often meet and even use wireless networks. The wireless network is famous all over the world, and its usage is increasing day by day. Wireless networks are faster and easier to set up than wired networks. Also, it reduces the use of cables that are difficult to install and increases the risk of safety as the user may trip over the wires and fall. Users must update a wireless network to meet the new configuration if they want to change networks. So, let's start with Brother wireless setup on your Windows and Mac computers without further ado.
How To Connect a Brother Printer Via Wi-Fi?
For a Brother printer to work wirelessly, you must have the printer and your computer on the same wireless network. In order to connect a Brother printer to a Wi-Fi network, kindly perform the basic instructions in the section below:
- Turn on the router and ensure you have placed the Brother printer within a Wi-Fi network range.
- Connect the printer's power cord to a wall socket and turn it on.
- After that, hit the "Menu" button located on the printer.
- Use the arrow buttons to select the "Network" option and press the "OK" button.
- Use the arrow buttons to select the "WLAN" option and hit the "OK" button.
- Select the "Setup Wizard" option using the arrow buttons, and tap the "OK" button.
- When you see the option "Wi-Fi Enable," hit the "Yes" button.
- The printer will automatically search for wireless networks from the available list.
- Select your Wi-Fi name from the list and click on the "OK" button.
- Now, it will prompt for your Wi-Fi password. Type your password and hit the "OK" button.
- This will complete connecting the Brother printer to a Wi-Fi network.


So, by following the above instructions, you can connect a Brother printer to a Wi-Fi network.
Steps To Connect a Brother Wireless Printer To Windows
Complete the procedures below to connect a Brother wireless printer to your Windows computer:
- First, turn on the Brother printer and connect it to Wi-Fi by following the steps in the section above.
- Afterward, go to "support.brother.com" to download a compatible driver for your PC.
- Once you’ve completed the installation process, then proceed to the next step.
- From the "Start" menu, open the "Run command box," enter the "Control Panel" in the box and hit the "OK" button.
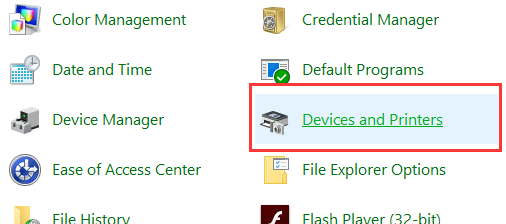
- From the Control Panel tab, select the "Devices & Printers" section.
- Click on the “Add a Printer” option, select the printer from the given list, and hit the “Next” button.
- Now, wait a few minutes for the setup to complete.
- Finally, a connection is now established between the Brother wireless printer and your Windows.


Steps To Connect a Brother Wireless Printer To Mac
Follow these simple and easy directions in order to connect a Brother wireless printer to your Mac system:
- Power on your Mac system and download a compatible driver from “support.brother.com.”
- Please turn on the printer and put it on the same wireless network as your PC (steps described in the first section of this blog).
- Open the "Apple" menu and click on the "System Preferences" option.
- On the next screen, select the "Printers & Scanners" section.
- Under this option, you can see the printer with a green mark.
- If you do not see the printer, tap the "+" icon in the next step.
- Select the printer and press the "Add" button from the open pop-up window.
- You can connect the Brother wireless printer to your Mac system using these prompts.


How To Connect a Brother Printer Via Wi-Fi Direct?
Wi-Fi Direct allows you to connect your Brother printer directly to a computer or smartphone without a Wi-Fi router/access point, Your printer acts as a Wi-Fi access point.
- Ensure the printer's Wi-Fi Direct settings. When connected to a smartphone, use a Windows or Mac to confirm the setting.
- For Windows:
- First of all, connect your printer and PC using a USB cable.
- Then, start the Printer Setting tool on a PC, and hit the "Communication Settings" button.
- Ensure that a "Wi-Fi Direct" network is selected for the "Selected Interface" section in the "General" tab
- For Mac:
- First, connect your printer and PC using a USB cable.
- After that, start the Printer Setting tool on a PC, and ensure that Wi-Fi Direct is set to "On" mode in the "Wireless LAN" section.
- Click and hold the Wi-Fi button on the printer for 1-2 seconds to turn it on.
- Now, the Wi-Fi lamp flashes blue once every 3 seconds.
- In the next step, use your PC or smartphone to select the printer's SSID ("DIRECT-*****_PJ-773" where "*****" is the last 5 numbers of the printer serial number) and type your password.
- When the connection is set, the Wi-Fi lamp flashes blue.